FazalLabPipelines
TrimMapCount: Data Alignment for RNA-Seq Experiments
The TrimMapCount pipeline will map your RNA sequences to a reference genome and count how many reads map to each gene. This process produces useful data files from your raw data.
Setup
Making Project Folders
On the TACO cluster, the Fazal lab has folders named rawdata, data, and projects. The
rawdata folder is for your raw data files, the data folder is for your processed data files,
and the projects folder is for all of your output tables and figures.
To begin, you should create a folder inside your rawdata folder, data folder, and project folder
all with the same name. The name should have today’s date and a title for your project separated by an
underscore (for example: YYYYMMDD_MyProject). Your file structure and file names should look something
like this:
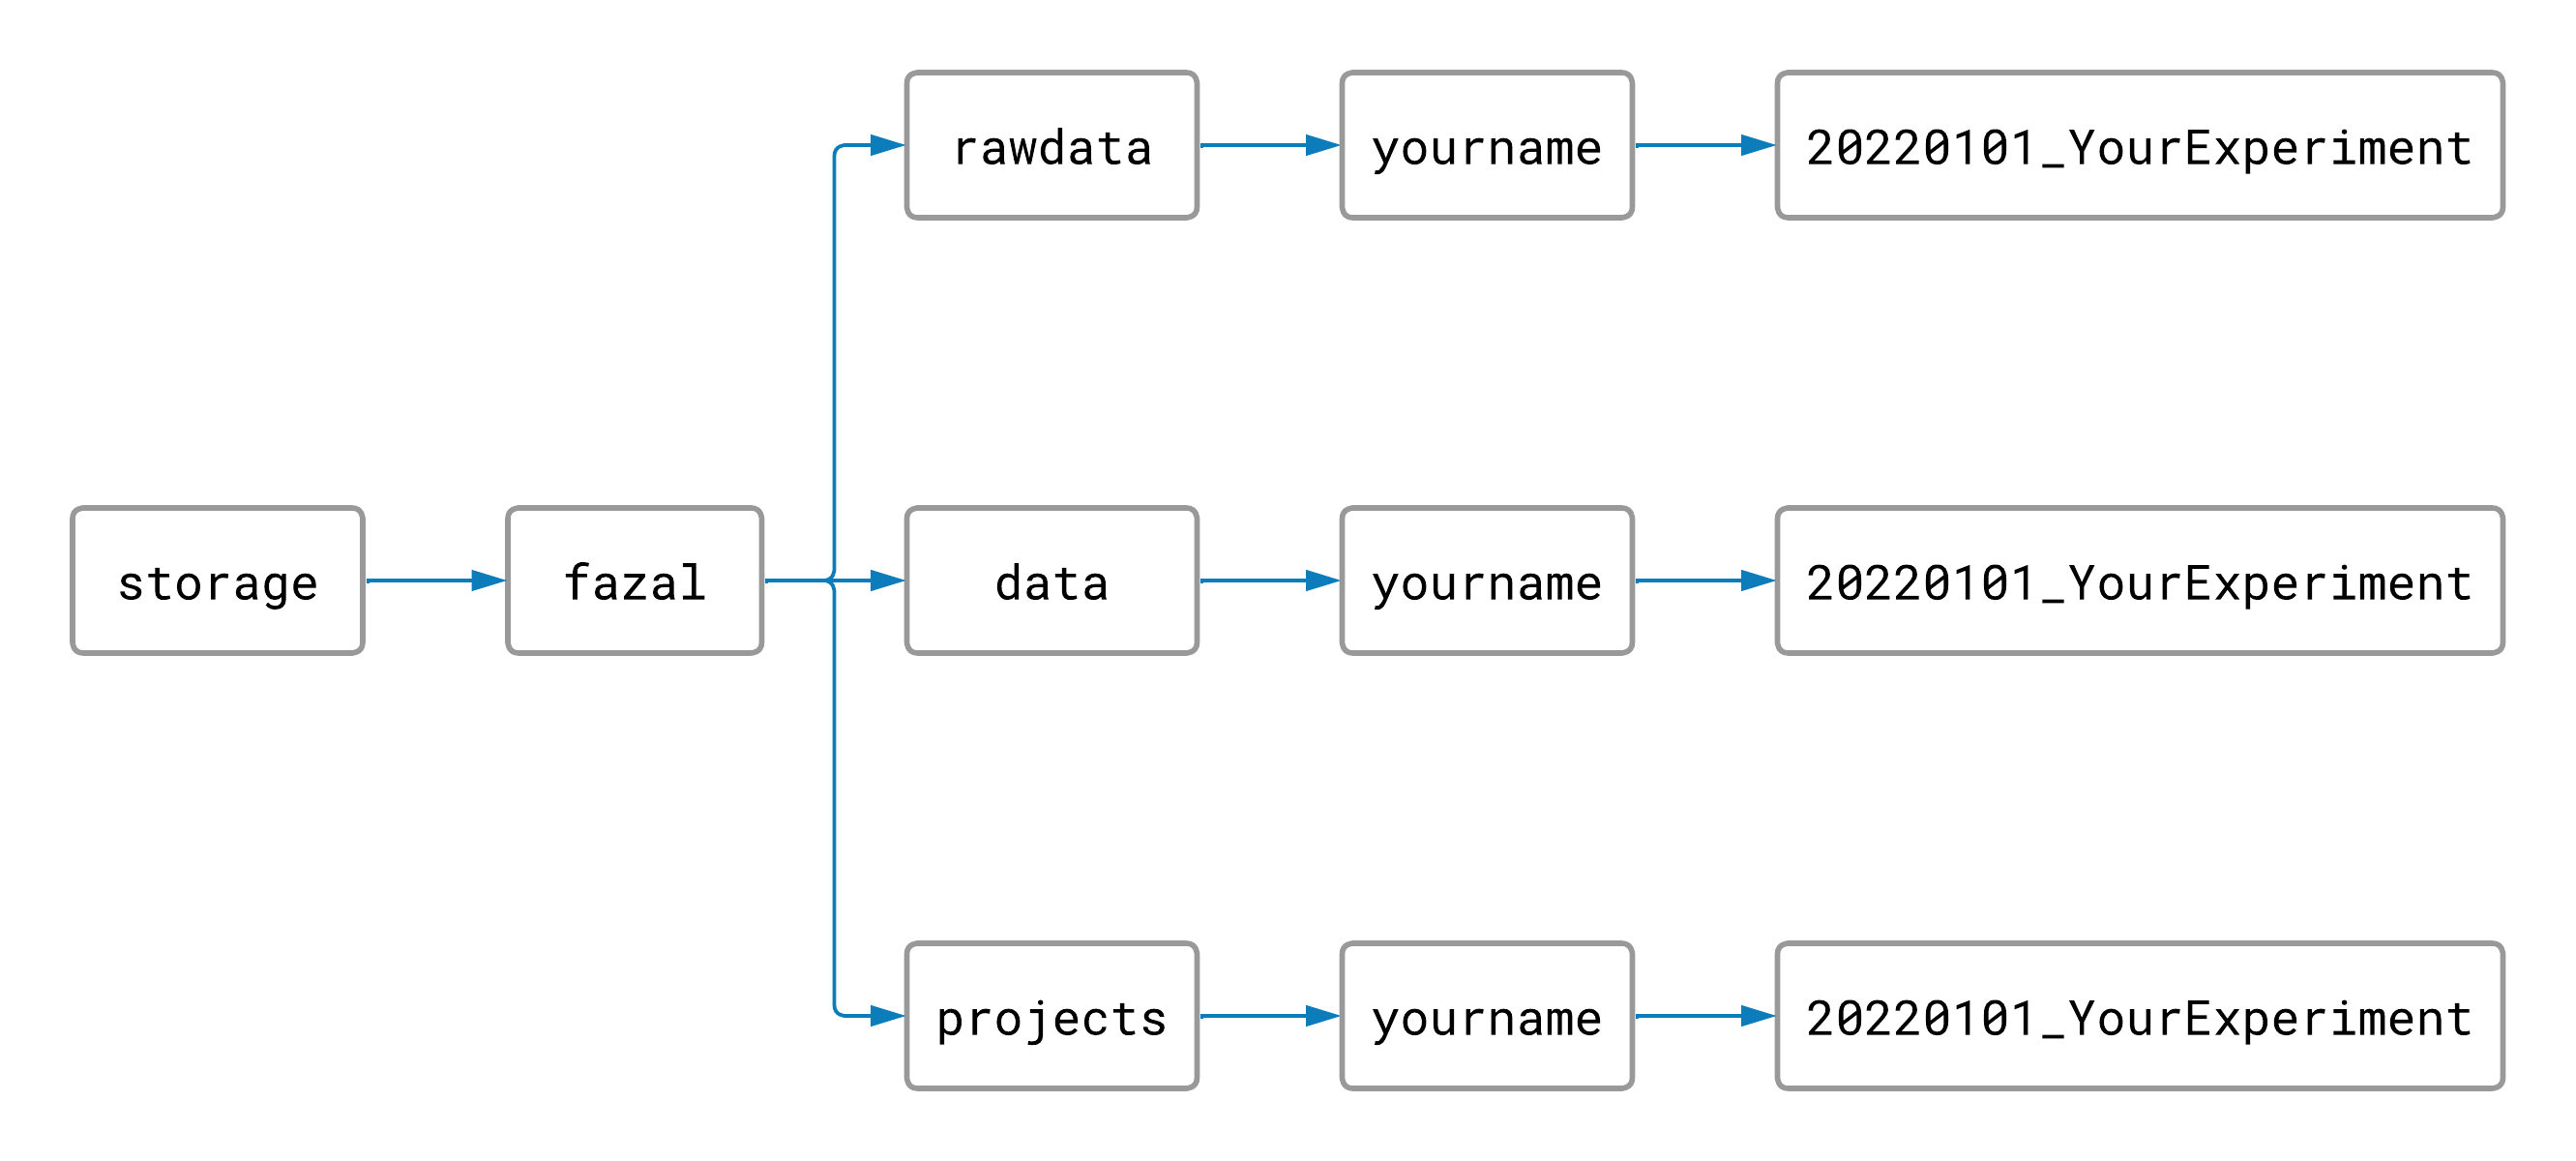
Naming and arranging our folders this way will help keep the TACO cluster organized.
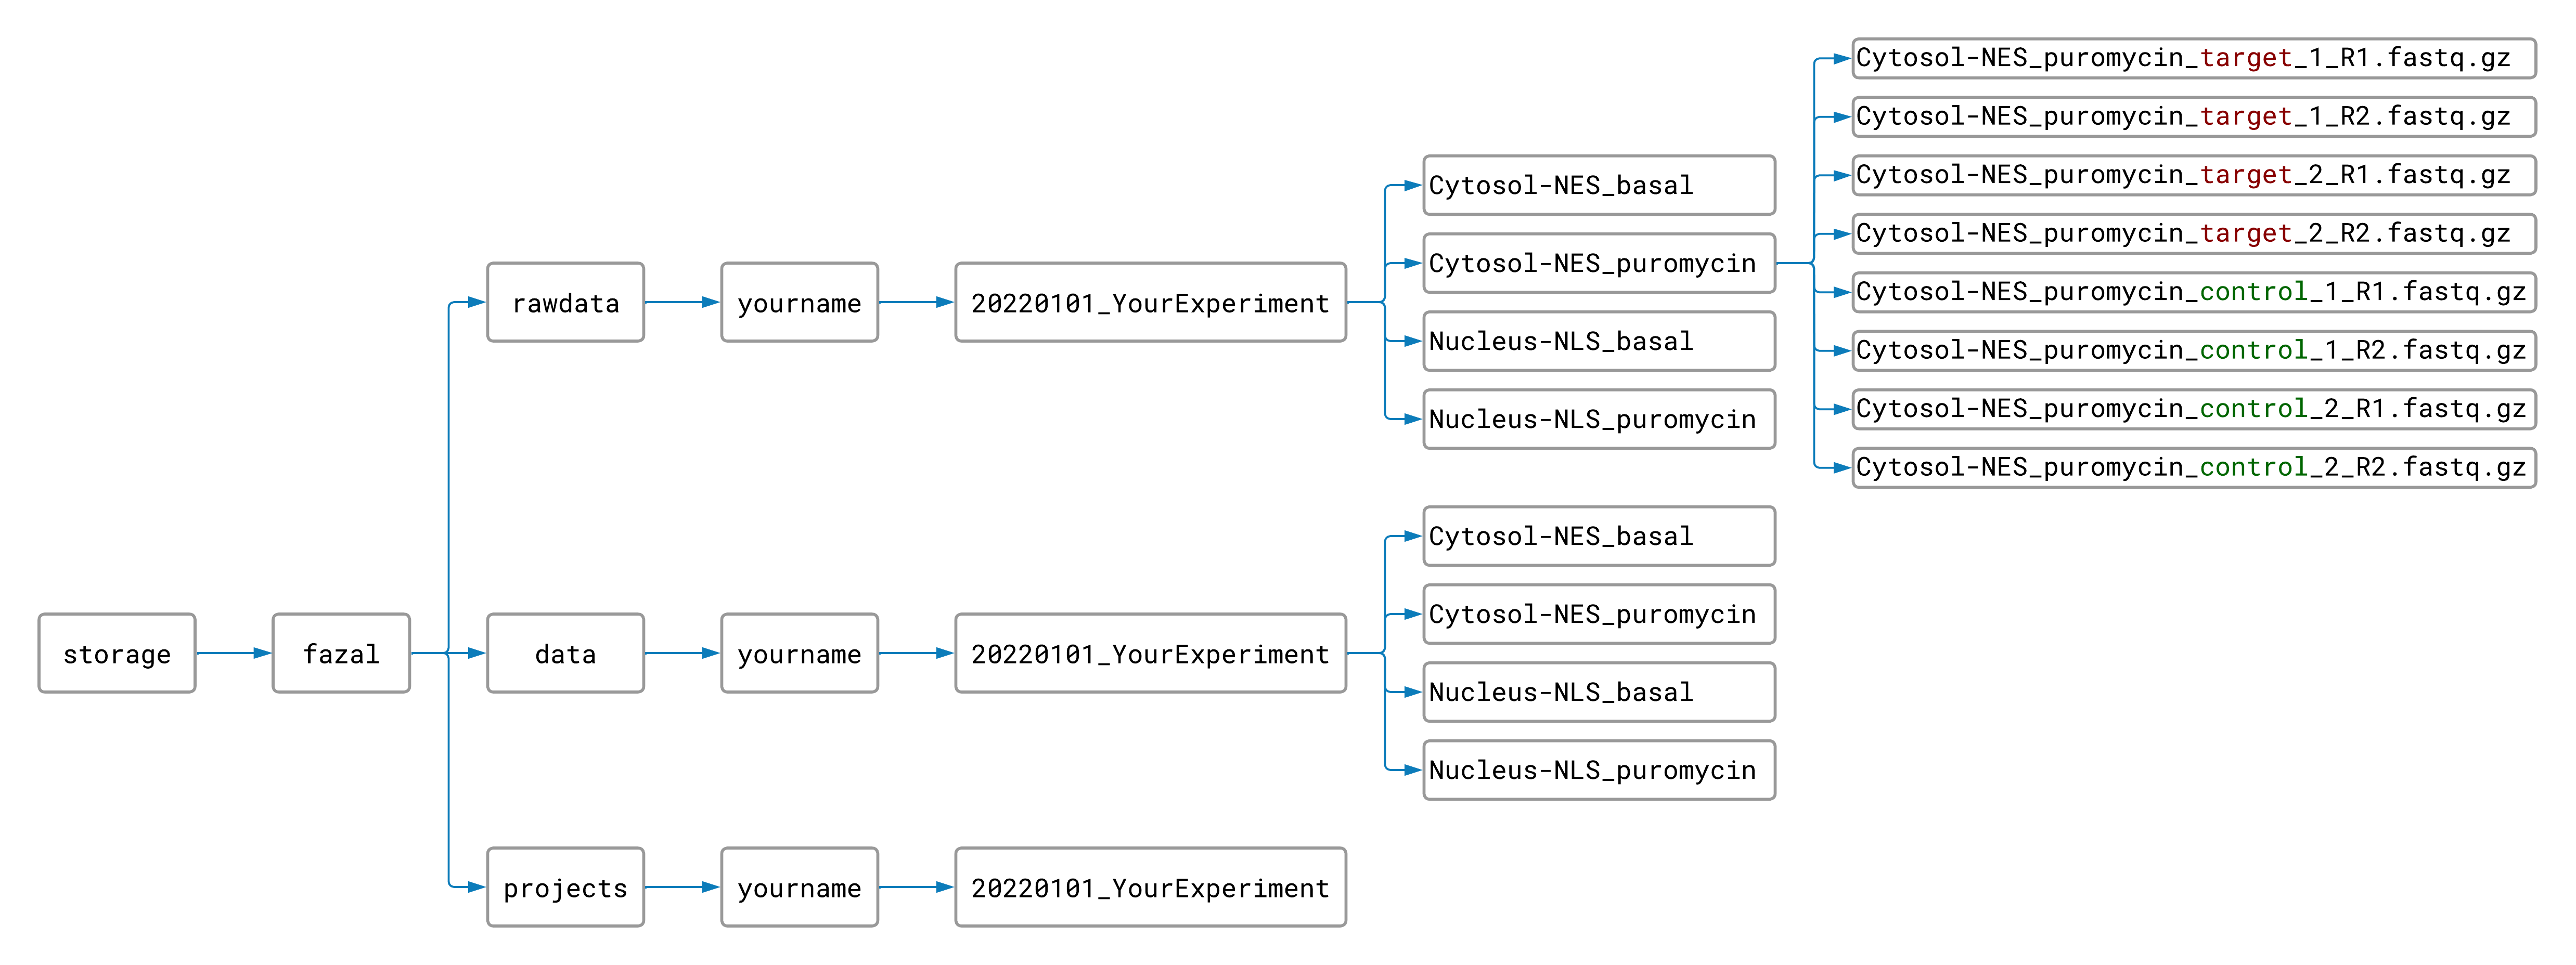
Naming Raw Data Files
In order for the pipeline to understand your experiment and what data is in each file, you have to name your raw data files a certain way that the computer will recognize.
Rename your raw FASTQ files so that each file name has these 5 things (in order and separated by underscores):

- Targeted location/protein (can’t contain an underscore)
- For an APEX-seq experiment, the subcellular location where APEX is targeted and/or which protein the enzyme is fused to
- Experimental condition (can’t contain an underscore)
- Could be a time limit, cell type, antibiotic treatment, etc., or “basal” for no condition
Note: Need to label your data files with more experimental conditions? Just separate the extra conditions with a hyphen or period like this:
CellLine-TargetedProtein_DrugTreatment.TimeLimit_target_1.R1.fastq.
- Could be a time limit, cell type, antibiotic treatment, etc., or “basal” for no condition
- “target” or “control” (first letter can be capitalized)
- For an APEX-seq experiment, whether the targeted location was labeled by adding H2O2 (target) or not (control)
- A number to indicate which target or control sample (one digit 0-9)
- “R1.fastq” or “R2.fastq” (or “R1.fastq.gz” and “R2.fastq.gz” for zipped files)
For example, if cytosolic RNA was the target (APEX enzyme fused to NES protein), and your cells were all treated with puromycin for 30 minutes…
| …your data files might be named like this: | …or maybe like this: |
|---|---|
CytosolNES_puromycin30min_target_1_R1.fastq.gz CytosolNES_puromycin30min_target_1_R2.fastq.gz CytosolNES_puromycin30min_target_2_R1.fastq.gz CytosolNES_puromycin30min_target_2_R2.fastq.gz CytosolNES_puromycin30min_control_1_R1.fastq.gz CytosolNES_puromycin30min_control_1_R2.fastq.gz CytosolNES_puromycin30min_control_2_R1.fastq.gz CytosolNES_puromycin30min_control_2_R2.fastq.gz |
NES_puro_target_1_R1.fastq.gz NES_puro_target_1_R2.fastq.gz NES_puro_target_2_R1.fastq.gz NES_puro_target_2_R2.fastq.gz NES_puro_control_1_R1.fastq.gz NES_puro_control_1_R2.fastq.gz NES_puro_control_2_R1.fastq.gz NES_puro_control_2_R2.fastq.gz |
However you choose to name your files, just make sure you follow the 5 rules and that your file names are all consistent (same style, same spelling, same capitalization, etc.).
Sorting Raw Data Files
Create folders inside your experiment’s rawdata and data folders for each combination of targeted
location and experimental condition in your experiment like this:
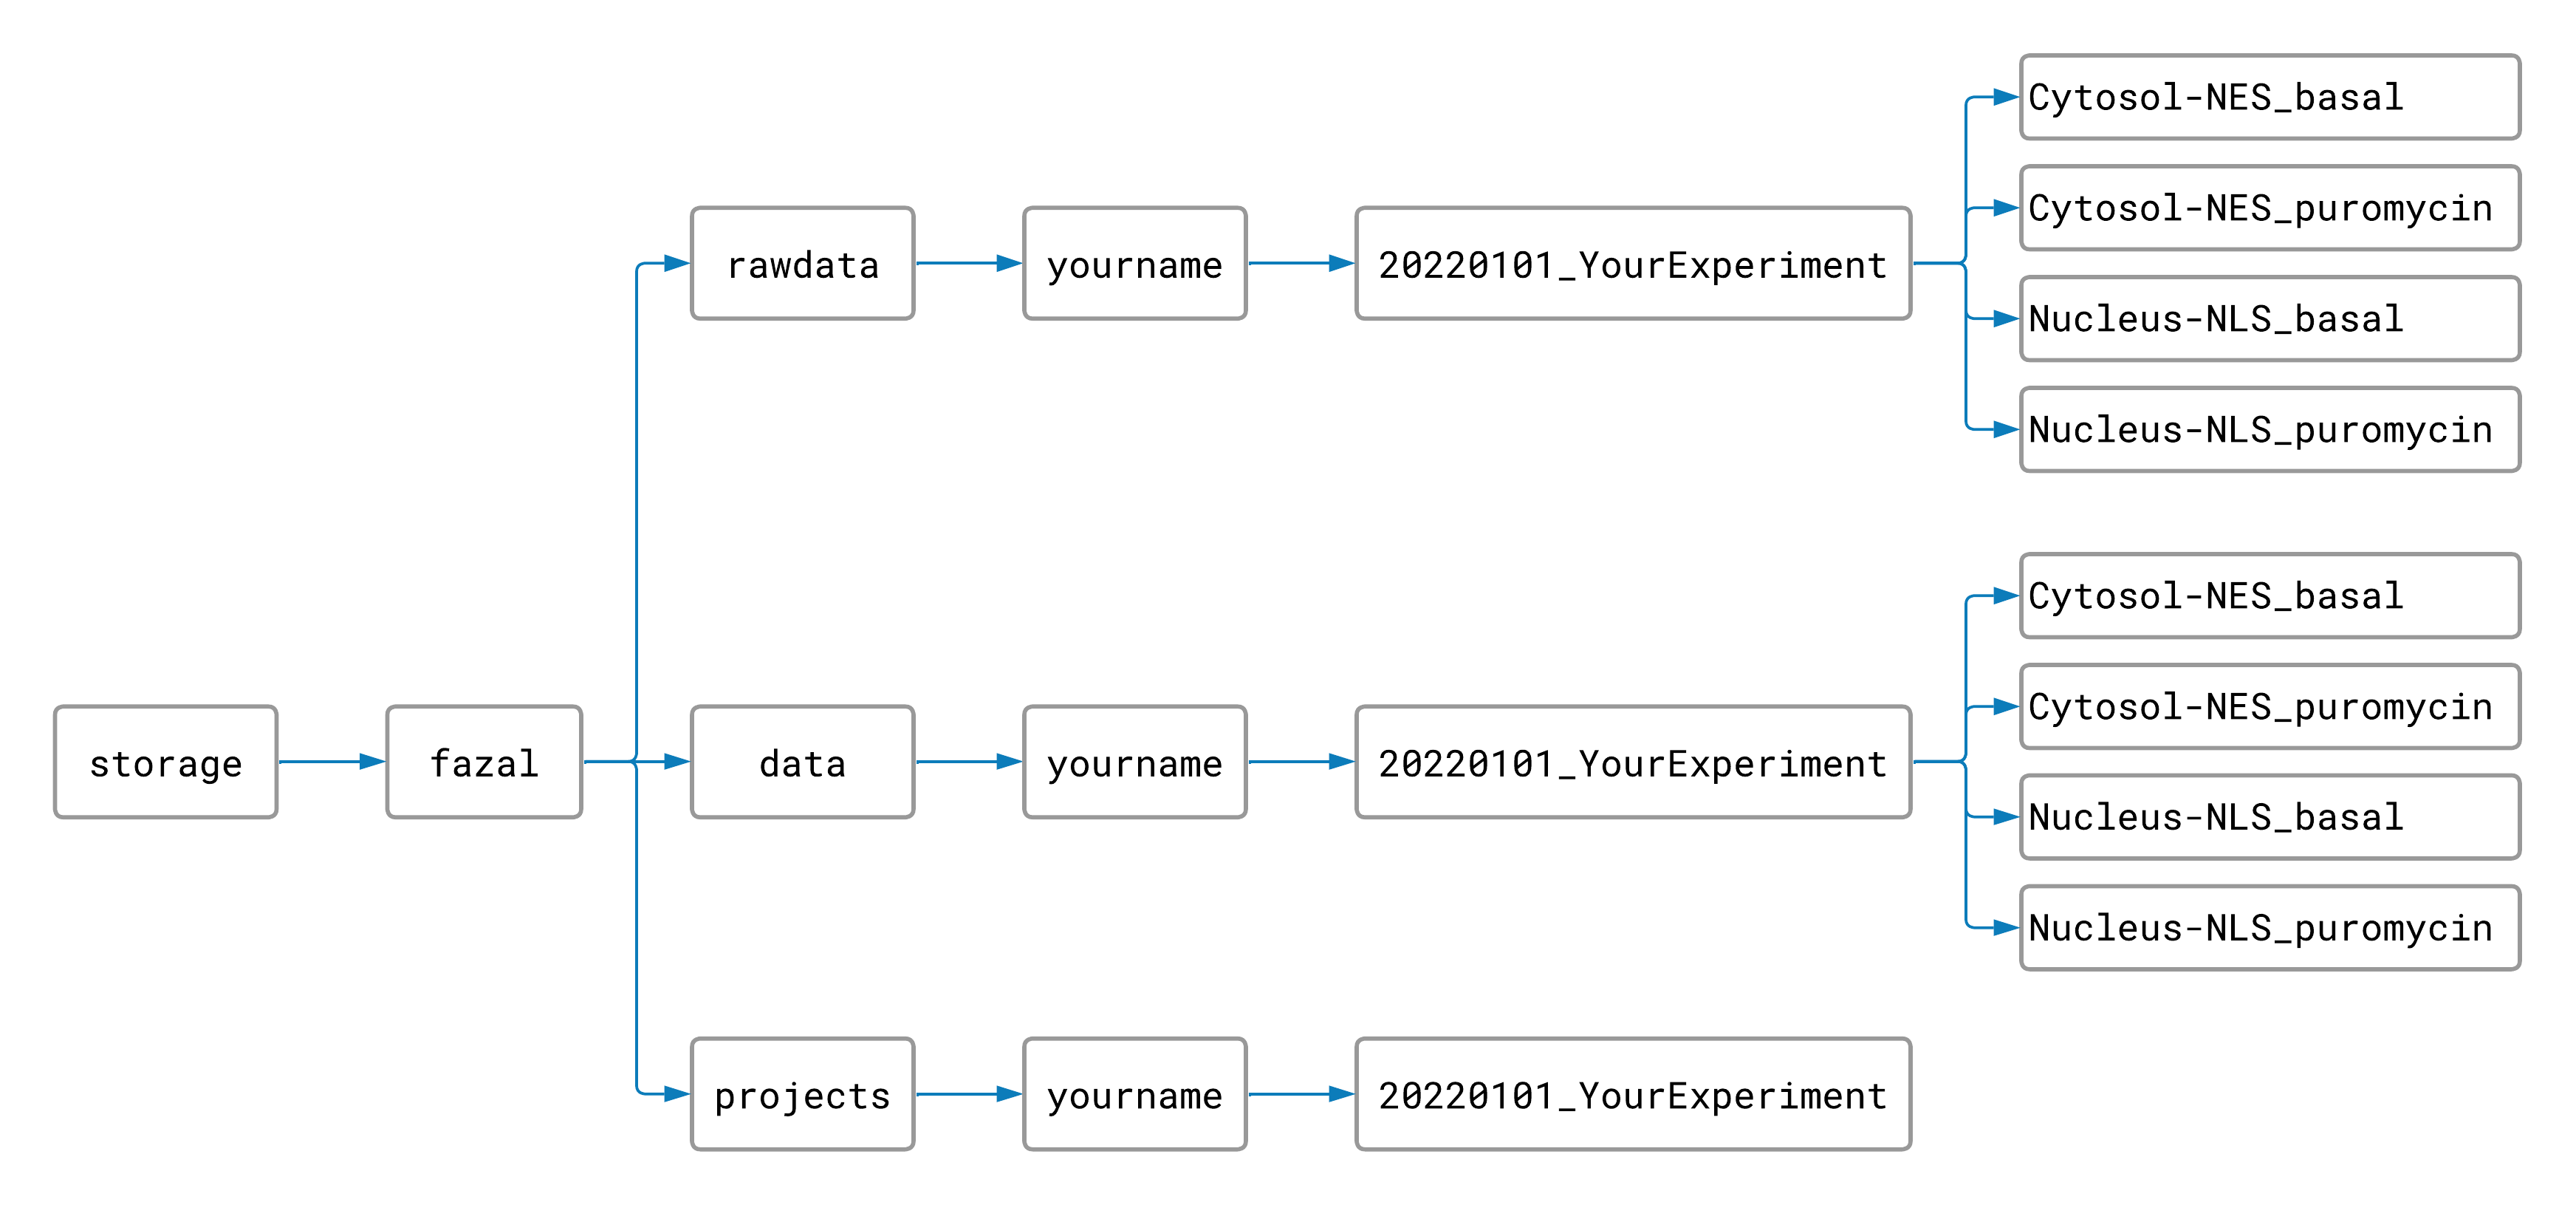
(This step isn’t neccessary, but it can save a lot of time. Instead of processing only one sample at a time, separating your data into subfolders makes it possible to process samples for every location and condition at the same time. Since each sample takes about 2 hours to process, you won’t want to skip this step!)
Move your renamed raw data files into the appropriate rawdata folders. Your files should now be
organized like this:
Now you are ready to run the pipeline! (The other pipelines don’t require any setup, so the worst part is over 😊.)
Running the Pipeline
-
Copy and paste this code in the command line and press “Enter”. (It will tell the computer where to find the code for the pipeline.)
export PATH=/storage/fazal/pipelines/TrimMapCount/scripts:"${PATH}"Alternatively, if you are doing deep sequencing, we recommend using this path instead.
export PATH=/storage/fazal/data/surbhi/test_novaseq_map_crop75/TrimMapCount/scripts:"${PATH}" -
Repeat steps 3 and 4 for each subfolder in your experiment’s raw data folder.
-
Run the following code (replacing the file paths with the paths to your experiment’s raw data and processed data subfolders):
TrimMapCount -r /storage/fazal/rawdata/yourname/yourexperiment/location_condition \
             -d /storage/fazal/data/yourname/yourexperiment/location_condition
Note: Run
TrimMapCount -horTrimMapCount --helpif you want to see the help menu. -
Make sure that the raw data and processed data file paths are correct. Then enter “y” to start the pipeline.
What next?
You can check the “TrimMapCount.log” file in your processed data folder to see the progress of your job as it runs. It will say “DONE” at the bottom of the log file when the pipeline has finished successfully.
Once TrimMapCount has finished, you will have all of the data files necessary for the ProcessCounts and BamToBigWig pipelines. Head back to the main page to keep going!