FazalLabPipelines
Viewing Genome Tracks in the UCSC Genome Browser
After running the BamToBigWig pipeline, follow these steps to view your genome tracks in the UCSC Genome Browser.
Host Your BigWig Files Online
-
Go to your processed data folder on the cluster and download every BigWig file that ends in “controls_uns.norm_avg.bw” or “targets_uns.norm_avg.bw” to your local computer.
Note: If you chose to combine controls for data analysis with ProcessCounts, only download one control file: “all_controls_uns.norm_avg.bw”
Note: “uns” stands for unstranded. If you would like to see separate genome tracks for the forward and reverse strands, download the files ending in “controls_fwd.norm_avg.bw”, “controls_rev.norm_avg.bw”, “targets_fwd.norm_avg.bw”, and “targets_rev.norm_avg.bw” instead.
-
Sign in to BackBlaze (this is the online data hosting service we use in the lab).
Note: The sign in information is in the Lab Passwords document on OneDrive.
-
Click
Browse Files, then select the bucketBigWigFiles. -
Add a new folder for your experiment.
-
Open the new folder and upload your BigWig files.
Add Tracks to the Genome Browser
-
Open Notepad (Windows) or TextEdit (Mac).
-
For each BigWig file that you uploaded to BackBlaze: copy and paste this track line on a new line in the blank note, then replace
NameandURL.track type=bigWig name="Name" bigDataUrl=URL color=68,68,68 visibility=hideNote: The
Nameof your track is the name of your BigWig file (but you can remove “.norm_avg.bw” and use spaces instead of underscores if you want).Note: To get the
URLfor your BigWig file, click on the file name in BackBlaze to see its details, then copy the “Friendly URL”. -
Login to the UCSC Genome Browser (or sign up if you don’t have an account).
-
Open the custom track management page to add your custom tracks.
-
Paste your custom track lines into the “Paste URLs or data” text box, then press
Submit.
Create a Track Collection
-
At the top of the screen, select
My Dataand thenTrack Collection Builder. -
On the right side of the screen next to “Collected Tracks” click
Add Collection. Give your collection a name, then clickSave. -
On the left side of the screen under “Available Tracks”, click the folder labeled “Custom Tracks”. Then click the green plus sign next to each track you just uploaded to add it to your new collection. (You should see the tracks being added under the new collection folder you just made.)
-
On the right side of the screen, double click each of target tracks and change the color.
Note: Here are some good colors to choose from. Just enter the code into the “Color” box and press
Save.


-
Click
GOin the top right corner of the screen to return to the browser.
Configure the Viewing Window
-
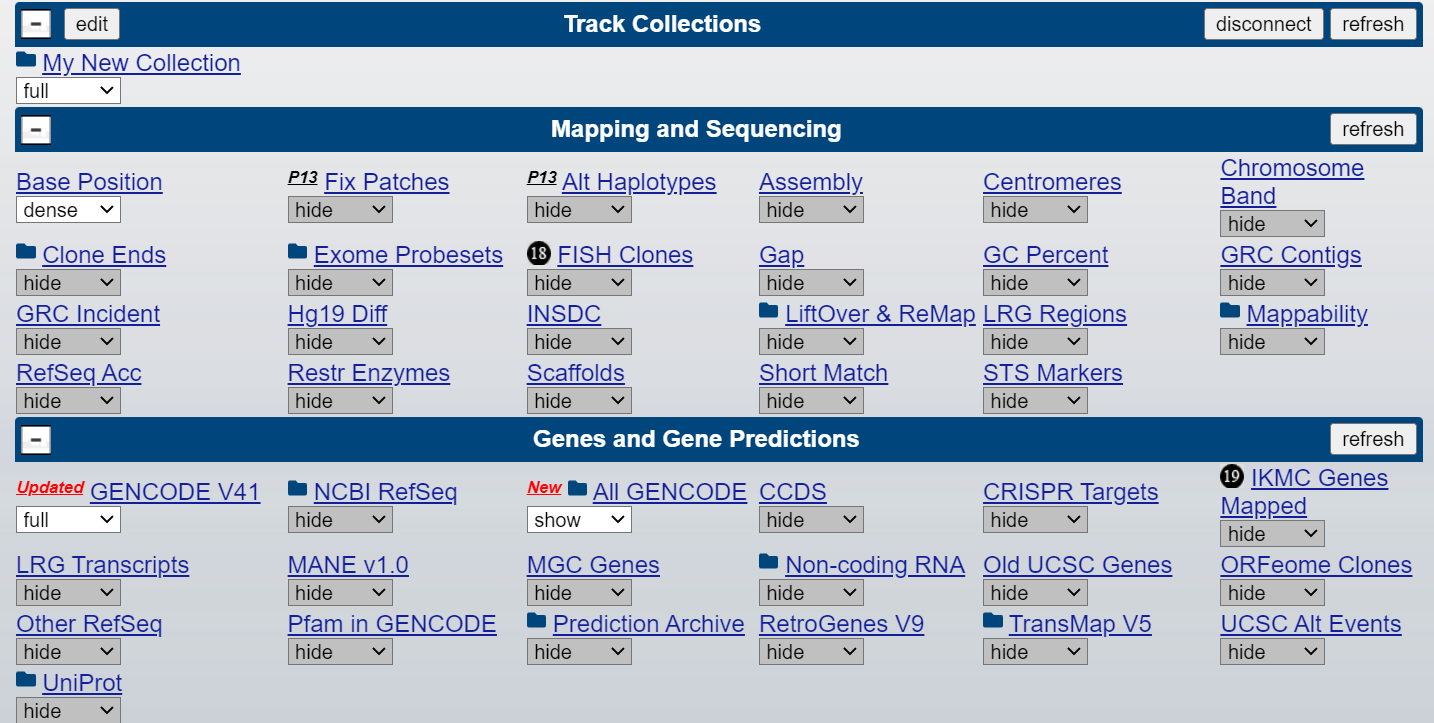
Scroll down to the collections listed below the viewing window. Make sure that all of the tracks and collections are set to “hide” except for your new collection and the others shown below:
-
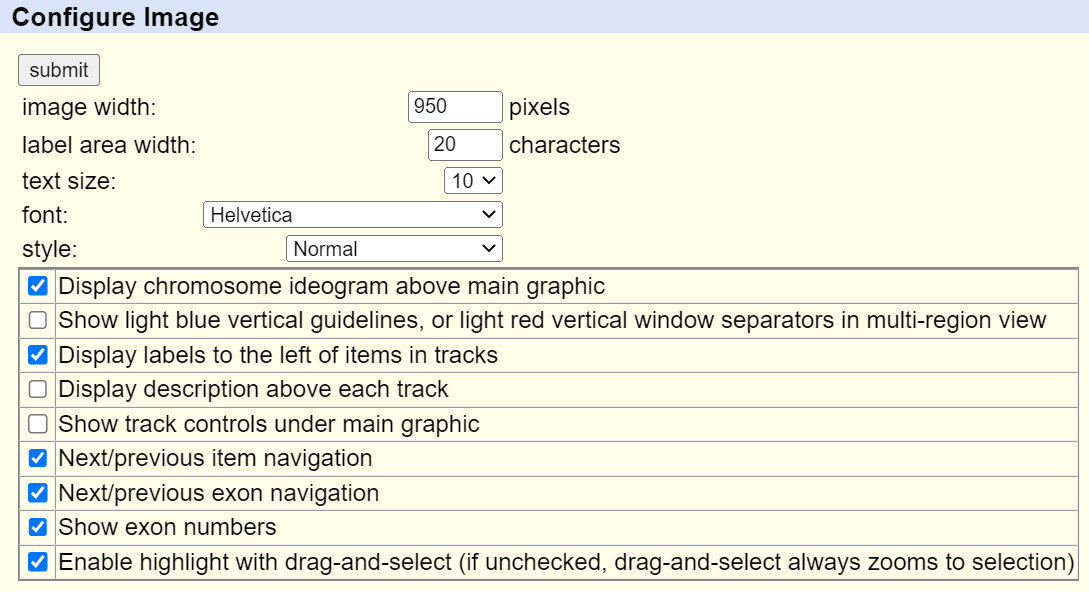
Click
configureat the bottom of the viewing window to configure the image according to your preferences. Then clicksubmit.Note: These are the default settings that I would recommend:
-
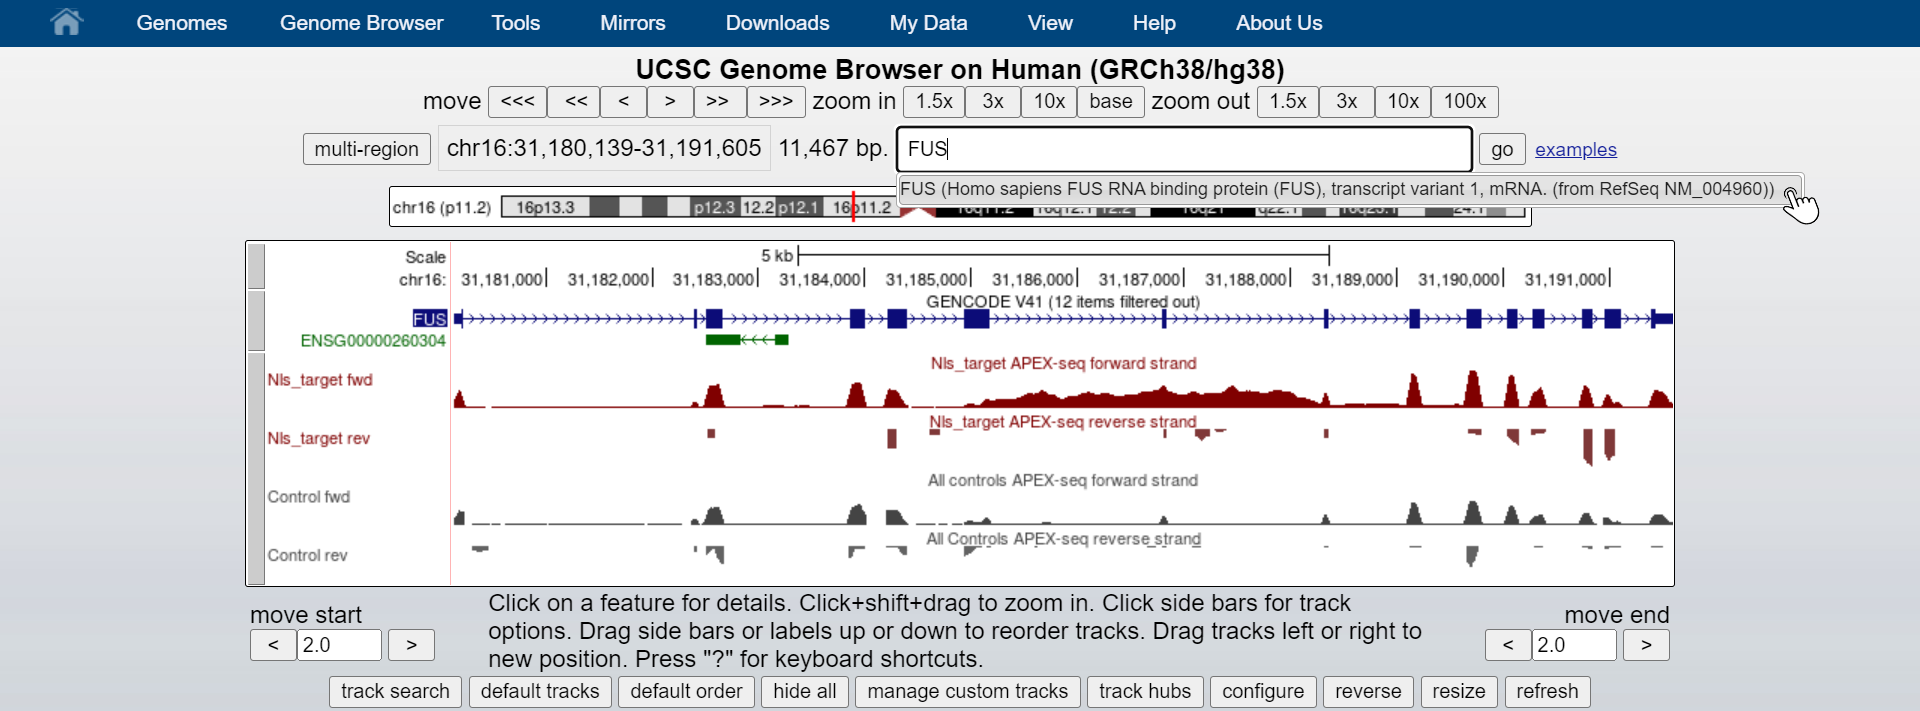
Drag the bar to the left of the GENCODE collection to position the genes above your tracks (as shown below).
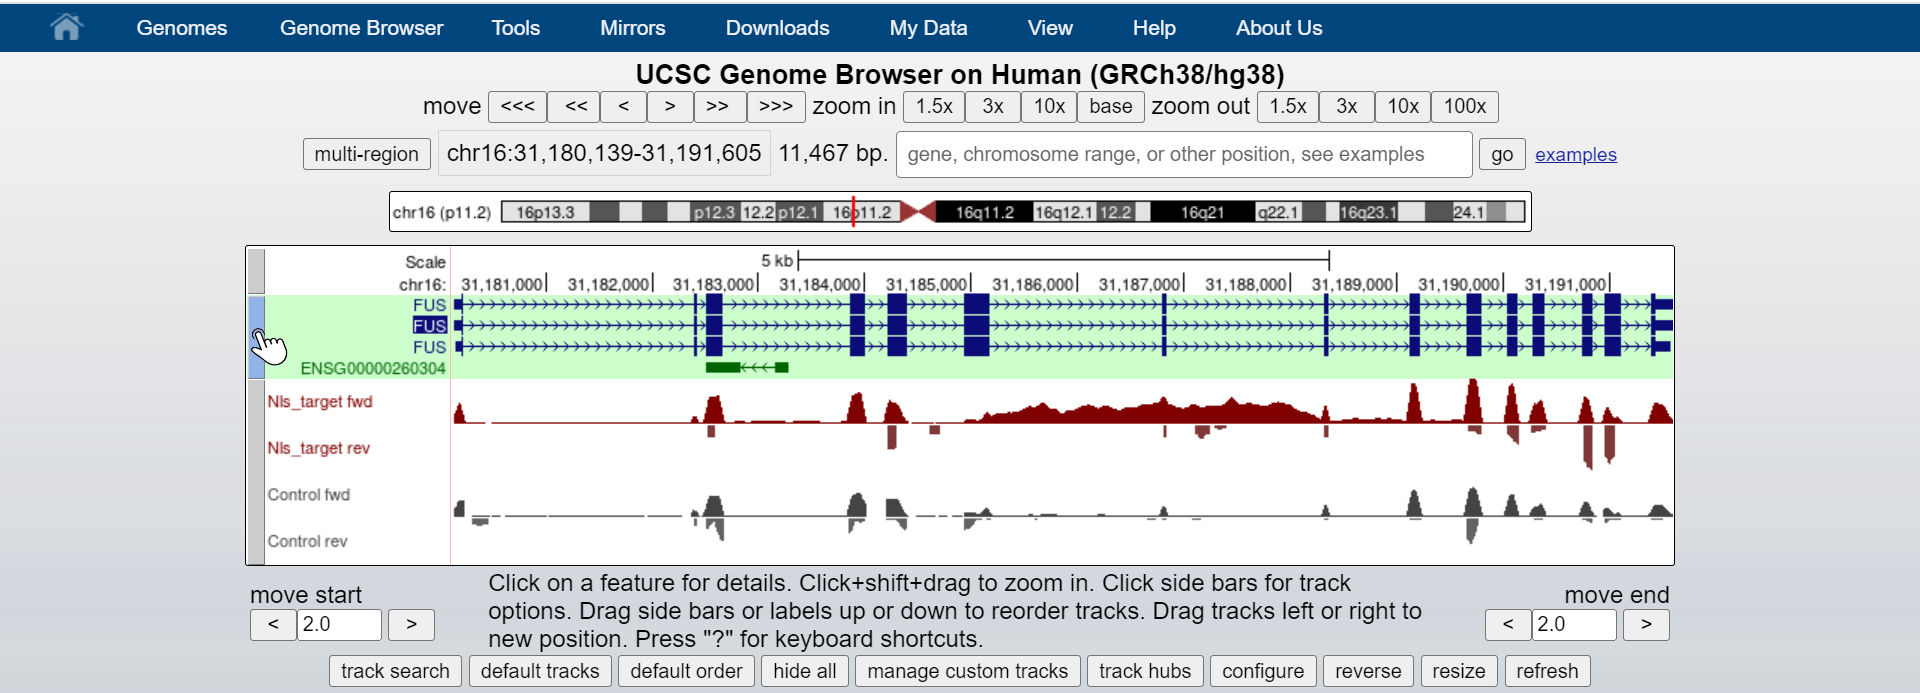
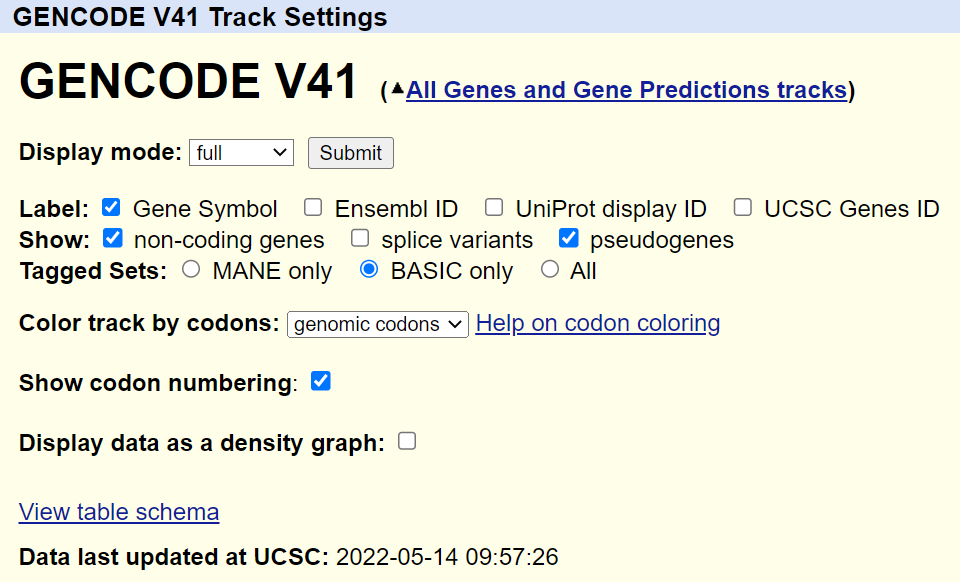
Now click the same bar to configure the genes displayed, then click
Submit.Note: These are the default settings that I would recommend:
-
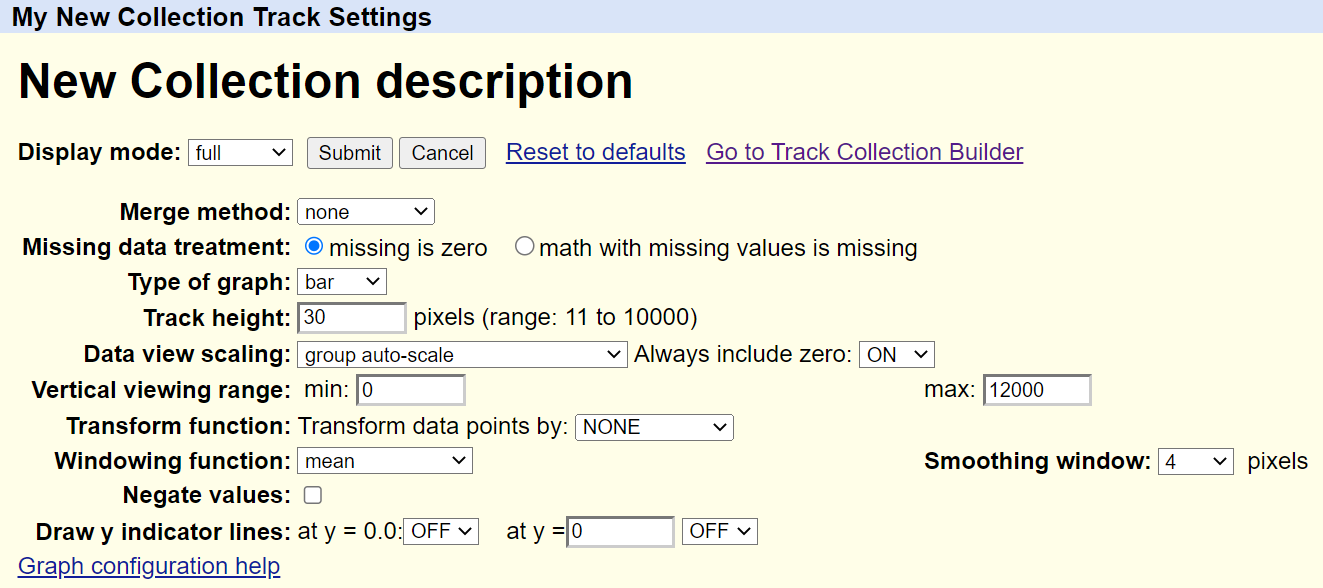
Click the gray bar to the left of your collection to configure your tracks, then click
Submit.Note: These are the default settings that I would recommend:
-
If you know of a good gene to have featured when you open your session, type the gene name in the search box and select it from the drop-down list of results.
Save Your Session
-
At the top of the screen, select
My Dataand thenMy Sessions. -
Under the heading “Save Settings”, locate the option to “Save current settings as named session”. Replace the text
hg38with the name of your session and clicksubmiton the right.
Now anyone can access your session at anytime using the link stored under “My Sessions”.
Happy browsing!